
Are you ready to transform your look with hair extensions? Whether you want to add length, volume, or experiment with new hairstyles, hair extensions can be a game-changer. But how do you style them seamlessly with your natural hair? In this article, we will share expert tips and techniques to help you master the art of styling hair extensions. Get ready to rock your extensions like a pro!
Key Takeaways:
- Learn how to hide shorter hairs with a braided bottom layer.
- Discover the convenience of using a hair extensions hanger for easier styling.
- Achieve a layered look without cutting your extensions by clipping them diagonally.
- Prevent wefts from slipping by backcombing your roots and using dry shampoo for hold.
- Create a voluminous look by stacking your extensions and storing them properly for longevity.
Hiding Shorter Hairs with Braided Bottom Layer
When wearing hair extensions, it’s important to blend them seamlessly with your natural hair. A common issue is shorter hairs peeking through the ends and giving away the presence of extensions. To hide these shorter hairs, gather the bottom layer of your hair at the nape of your neck and braid it. Wrap the braid flat against your head and pin it in place. Then, clip your extensions above the pinned area. This technique ensures a natural and polished look without any pesky shorter hairs showing.
If you’re unsure how to braid the bottom layer of your hair, here’s a step-by-step guide:
| Step | Description |
|---|---|
| 1 | Brush your hair to remove any tangles. |
| 2 | Gather the bottom layer of your hair, starting at the nape of your neck. |
| 3 | Divide the hair into three equal sections. |
| 4 | Cross the right section over the middle section, then cross the left section over the new middle section. |
| 5 | Continue crossing the right and left sections over the middle section, adding small sections of hair as you go. |
| 6 | Braid all the way down to the ends of your hair, securing it with a small hair elastic. |
| 7 | Wrap the braid flat against the back of your head, positioning it slightly above the nape of your neck. |
| 8 | Secure the braid in place with bobby pins, making sure to hide the ends. |
By following these steps, you’ll be able to braid the bottom layer of your hair and hide those shorter hairs, creating a seamless blend with your hair extensions. Now you can confidently rock your hair extensions without worrying about any telltale signs.
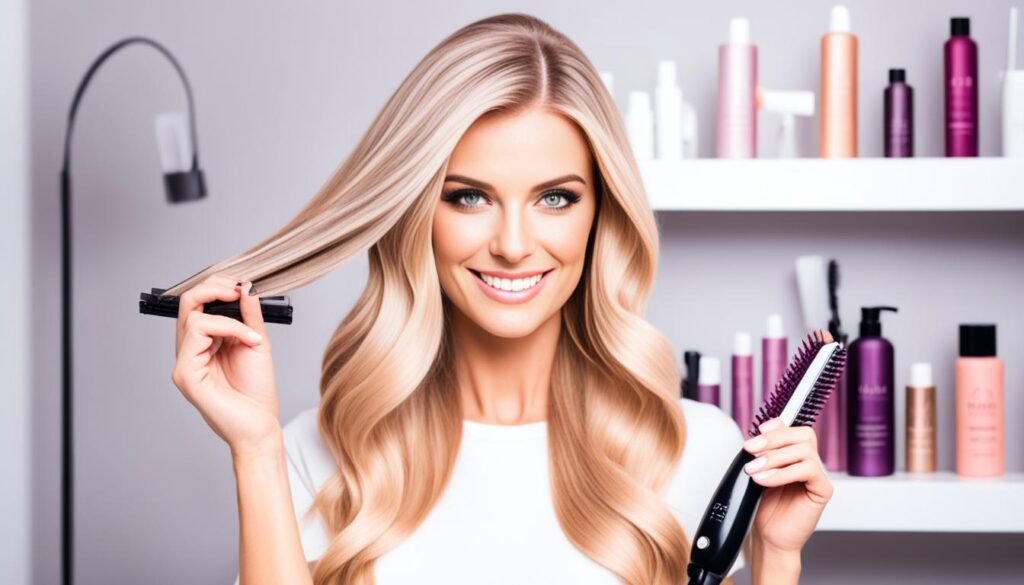
Easier Styling with Hair Extensions Hanger
Styling your hair extensions can be a breeze with the help of a hair extensions hanger. Luxy Hair offers a premium hair extensions hanger that is specifically designed to simplify the styling process.
With the Luxy Hair Extensions Hanger, you can easily secure your extensions while you curl, straighten, or style them. This convenient tool allows you to have both hands free for optimal styling control and precision.

The hair extensions hanger provides a sturdy and secure grip, ensuring that your extensions stay in place while you apply heat for curling or straightening. This eliminates the need to hold the extensions in your hands while styling, making the process much more comfortable and efficient.
Once you have styled your extensions to perfection, you can seamlessly clip them into your already styled hair. The hair extensions hanger makes it easy to achieve a flawless blend, resulting in a natural and voluminous look.
Whether you’re getting ready for a special occasion or simply want to switch up your everyday hairstyle, the hair extensions hanger is a must-have tool for easier and more efficient styling. Say goodbye to the hassle of holding your extensions while styling and say hello to salon-worthy results.
Achieving a Layered Look with Diagonal Clipping
If you have layered hair or want to create a layered look without cutting your extensions, clipping the wefts diagonally is a simple trick. By clipping the wefts in a diagonal line, you can achieve a natural high to low effect that blends perfectly with layered hair. Luxy Hair extensions, which are 20 inches long, make it easy to create the illusion of layers without the need for professional cutting.
When it comes to creating a layered look with hair extensions, diagonal clipping is a game-changer. This technique allows you to add dimension and movement to your hair without actually cutting the extensions. Whether you have naturally layered hair or want to fake a layered look, this method works wonders.
Opting for diagonal clipping involves strategically placing the wefts in a diagonal line across your head. This technique creates a beautiful cascading effect that mimics the appearance of layered hair. It’s the perfect way to add volume and texture to your hairstyle.
Here’s how you can achieve a fabulous layered look with diagonal clipping:
- Start by sectioning your hair. Take a small section of hair near the crown of your head and clip it away.
- Next, take the first weft of hair extensions and clip it diagonally across the back of your head, starting from one side and extending towards the other side.
- Continue adding more wefts in a similar diagonal fashion, working your way up towards the crown of your head.
- Once you reach the crown, release the clipped section of your natural hair and let it blend seamlessly with the extensions.
- Style your hair as desired, whether it’s loose waves, a sleek updo, or a voluminous ponytail.
By following these steps, you can achieve a stunning layered look that appears natural and effortless. Diagonal clipping is a great method for those who want to experiment with different hairstyles and textures without committing to a permanent haircut.
| Pros | Cons |
|---|---|
|
|
Expert Tip
For a more realistic layered look, opt for Luxy Hair extensions that match the length and texture of your natural hair. This will ensure a seamless blend and a natural appearance.
With diagonal clipping, you can enjoy the benefits of a layered look without the commitment or expense of cutting your extensions. Whether you have long locks or shorter hair, this technique offers versatility and allows you to experiment with different hairstyles.
So go ahead and clip your extensions diagonally to achieve a fabulous layered look that turns heads wherever you go!
Preventing Wefts from Slipping with Backcombing
If you have thin hair or find that your extensions need extra grip, backcombing your roots can help prevent the wefts from slipping. Backcombing creates more volume and texture at the roots, allowing the clips to fasten securely. Follow these steps to achieve a long-lasting hold:
- Section off a small portion of your natural hair where you will be clipping the weft.
- Using a teasing brush, backcomb the roots of the sectioned hair by gently combing in a downward motion towards the scalp. This technique adds texture and grip to the hair.
- To further enhance the hold, apply a small amount of dry shampoo to the backcombed roots. Dry shampoo adds additional texture and helps the wefts stay in place.
- Clip the weft onto the backcombed section of hair, ensuring that the clips are securely fastened.
- Repeat these steps for each section where you will be attaching the extensions, distributing them evenly throughout your hair for a natural look.
By backcombing your roots and using dry shampoo for hold, you can confidently rock your hair extensions without worrying about them slipping out of place.
| Benefits of Backcombing | Benefits of Dry Shampoo |
|---|---|
|
|

Backcombing your roots and using dry shampoo are effective techniques for preventing wefts from slipping and achieving a secure hold with your hair extensions. By incorporating these steps into your styling routine, you can confidently enjoy voluminous and glamorous hair.
Voluminous Look with Stacked Extensions
If you have a smaller head or struggle to fit all your extensions comfortably, stacking them can save space and create a voluminous look. By stacking two wefts together, you can create a mega weft that adds instant volume to your hair. This technique not only saves you from the hassle of managing multiple wefts but also provides a fuller and thicker appearance to the bottom section of your hair.
When stacking extensions, it’s important to keep in mind your comfort and the weight of the added hair. While stacking two wefts is generally safe and comfortable, stacking more than two wefts at a time could become too heavy or uncomfortable to wear.
To achieve a voluminous look with stacked extensions, follow these simple steps:
- Start with clean and dry hair.
- Secure your natural hair in a ponytail, leaving out a small section at the bottom.
- Take one weft and clip it at the base of your ponytail, making sure it’s securely fastened.
- Take a second weft and position it slightly higher, clipping it on top of the first weft.
- Continue stacking additional wefts, if desired, ensuring a secure and comfortable fit.
- Style your stacked extensions as desired, whether it’s a sleek high ponytail or voluminous curls.
With stacked extensions, you can easily add thickness and volume to the bottom section of your hair, making it an ideal styling option for individuals with layered or thinning hair. Try this technique to create a head-turning look with added confidence and flair.
Proper Storage for Longer Lifespan
Properly storing your extensions is essential to prolong their lifespan and prevent tangling. To ensure your extensions stay in top condition between wears, we recommend the Luxy Hair Extension Carrier. This must-have accessory offers both convenience and style, making it the perfect solution for storing your extensions.
The Luxy Hair Extension Carrier comes with a bamboo hanger that allows you to hang your extensions securely. This prevents them from getting tangled and ensures they maintain their shape. Additionally, the carrier features a durable fabric cover that protects your extensions from dust, dirt, and damage. With this carrier, you can have peace of mind knowing your extensions are stored safely.
Not only is the Luxy Hair Extension Carrier functional, but it’s also travel-friendly. It rolls up easily and fits perfectly into your purse, making it convenient to bring on your travels. Whether you’re heading to a special event or going on vacation, your extensions will be protected and ready to use whenever you need them.
Investing in the Luxy Hair Extension Carrier is a great way to take care of your extensions and maximize their lifespan. By preventing tangling and damage, you can enjoy beautiful and long-lasting extensions for multiple uses. Store your extensions properly with the Luxy Hair Extension Carrier and keep them looking their best.
Pre-Curling Extensions for Quick Styling
If you have a special event coming up or limited time to style your hair, pre-curling your extensions the day before can be a game-changer. This time-saving hack allows you to have gorgeous, long-lasting curls without the hassle of curling your hair on the day of the event. Here’s how you can achieve it:
- Curl your extensions: Start by curling your hair extensions using a curling iron or a heatless curling method, depending on your preference. Ensure that you curl all the individual wefts for a consistent look.
- Secure the curls: Once you’ve curled your extensions, gently roll them up and secure them with bobby pins to maintain the curl shape. This step is essential for ensuring that your curls stay intact until you’re ready to wear them.
- Time for the big reveal: On the day of the event, simply take out the bobby pins and unravel the curls. You’ll be amazed at how perfectly styled your extensions are, with long-lasting curls that will hold throughout the day or evening, without the need for any extra styling.
Pre-curling your extensions not only saves you time but also ensures that you have stunning curls that can withstand any occasion. So go ahead, try this technique and get ready to wow everyone with your effortlessly styled hair!
Seamless Ponytail with Upside Down Clipping
Creating a voluminous ponytail with hair extensions is effortless, but to achieve a seamless look without any bumps where the wefts are attached, try clipping your extensions upside down. By flipping the wefts and clipping them in an inverted position, they lay flat against your head when you pull your hair up into a ponytail, making them virtually undetectable.
This clever hack not only ensures a flawless and natural-looking ponytail but also allows you to effortlessly create sleek and sophisticated updos. You can confidently rock any hairstyle without worrying about the telltale signs of clipped-in extensions. Say goodbye to visible wefts and hello to a seamlessly blended ponytail!
How to Clip Extensions Upside Down for a Seamless Ponytail
Follow these steps to achieve a flawless seamless ponytail using the upside-down clipping technique:
- Start by brushing your natural hair and extensions to ensure they are smooth and tangle-free.
- Gather your natural hair into a high ponytail and secure it with a hair elastic.
- Flip your head forward, positioning yourself upside down.
- Take your hair extensions and clip them in, starting from the bottom and working your way up.
- Attach the wefts in a straight line just below the hair elastic, ensuring they are clipped securely and evenly spaced.
- Carefully flip your head back up, allowing your ponytail to fall naturally.
- Smooth out any bumps or lumps with your fingers or a comb, ensuring a seamless and polished finish.
- Secure the ponytail with additional hair ties or bobby pins if desired.
- To add extra volume and length, you can stack additional wefts on top of the base ponytail.
With the upside-down clipping technique, you can confidently rock a seamless and voluminous ponytail that looks entirely natural. Whether you’re heading to a special event or just want to elevate your everyday hairstyle, this method will ensure that your hair extensions stay hidden while providing the desired length and volume.
| Benefits of Clip Extensions Upside Down | What to Avoid |
|---|---|
|
|
Hiding Hair Elastic with 1-Clip Weft
Achieve a polished and sophisticated ponytail by hiding your hair elastic with a 1-clip weft. Simply wrap the weft around the hair elastic to hide it and secure it in place. This simple hack elevates the look of your ponytail, making it suitable for various occasions, from the office to a night out.
Are you tired of your ponytail looking messy with a visible hair elastic? With this clever trick, you can create a polished and sleek look that will turn heads.
To hide your hair elastic and add a touch of elegance to your ponytail, you’ll need a 1-clip weft. This small clip-in hair extension is designed to blend seamlessly with your natural hair and provide the perfect cover for your hair elastic.
Begin by gathering your hair into a ponytail using a regular hair elastic. Make sure it’s positioned at your desired height.
Next, take the 1-clip weft and wrap it around the hair elastic. Position the weft right above the elastic, ensuring that it covers the elastic completely.
You can secure the weft in place by either clipping it to the hair elastic or using bobby pins to hold it firmly against your head. Be sure to position the weft evenly around the elastic for a seamless look.
Once the weft is in place, you can adjust and style your ponytail as desired. Whether you prefer a sleek and polished look or a more voluminous ponytail, this simple hack will help you achieve a refined and sophisticated hairstyle.
The best part about using a 1-clip weft to hide your hair elastic is that it’s quick and easy to do. You can elevate any ponytail hairstyle in just a matter of minutes, making it perfect for busy mornings or last-minute events.
So the next time you want to rock a ponytail, remember this simple trick. With the help of a 1-clip weft, you can hide your hair elastic and create a polished ponytail that exudes confidence and style.
Brushing Extensions with the Right Hairbrush
One of the challenges of brushing your hair with extensions is the risk of snagging and pulling, especially with traditional brushes that can catch on the roots and move the wefts. To ensure the longevity of your extensions and prevent any damage or discomfort, it’s crucial to use a hairbrush specifically designed for extensions.
The Luxy Hair Loop Hair Extensions Brush is the perfect tool for brushing your extensions without any snagging or pulling. This specialized brush features unique nylon loop bristles that gently glide through your hair, detangling knots and smoothing out tangles, all while keeping your extensions securely in place.
Unlike traditional brushes, the loop bristles of the Luxy Hair Extensions Brush prevent the bristles from catching on the extensions, ensuring a smooth and seamless brushing experience. The looped design of the bristles allows them to effortlessly glide through your hair, detangling and smoothing without causing any damage or pulling.
Whether you have clip-in extensions, tape-ins, or wefts, the Luxy Hair Extensions Brush is suitable for all types of extensions. It’s an essential tool in your haircare routine, helping you maintain the beauty and integrity of your extensions.
With the Luxy Hair Extensions Brush, you can confidently brush through your extensions without the fear of snagging, pulling, or compromising their quality. Keep your hair extensions looking their best with this specially designed brush.
| Benefits of the Luxy Hair Loop Hair Extensions Brush |
|---|
| Prevents snagging and pulling |
| Gently detangles and smooths out tangles |
| Specially designed bristles for extensions |
| Compatible with all types of extensions |
Trendy Extension Hairstyles to Try
Now that you have learned the expert tips and techniques for styling hair extensions, it’s time to put them to use and try out some trendy extension hairstyles. Whether you’re looking to achieve mermaid waves, a low ponytail, a high ponytail, or a Dutch braid, these hairstyles will elevate your look effortlessly.
Mermaid waves are a popular choice for those who want to add a touch of glamour to their hair. To achieve this look, simply curl your hair extensions using a curling iron or wand. Once curled, gently comb through the waves with your fingers for a soft and tousled effect. Whether you’re attending a wedding or a special event, mermaid waves are sure to make a statement.
A low ponytail is a classic and timeless hairstyle that can be easily enhanced with hair extensions. Start by clipping in your extensions and gather your hair at the nape of your neck. Secure it with a hair elastic and use a 1-clip weft to hide the elastic for a polished finish. This chic and effortless hairstyle is perfect for both casual and formal occasions.
If you’re looking to add some drama to your look, a high ponytail with extensions is the way to go. Clipping your extensions in upside down can help create a seamless and voluminous ponytail without any bumps or visible wefts. Pull your hair up into a high ponytail and secure it with a hair elastic. With the added length and volume provided by your extensions, your ponytail will make a bold statement.
For a more intricate and beautiful hairstyle, try a Dutch braid with extensions. Dutch braids are characterized by their inverted appearance and are a popular choice for those who want a trendy and textured hairstyle. Before braiding, clip your extensions in and create a Dutch braid by crossing the strands under each other instead of over. This hairstyle is perfect for a boho-chic look or to add some flair to your everyday style.