
Are you tired of spending a fortune at the salon every time you want to change your hair color? Or perhaps you crave the convenience of coloring your hair in the comfort of your own home? If you’ve ever wondered if achieving salon-quality results at home is possible, we have the expert tips and tricks you need to know.
In this article, we will guide you through the process of DIY hair coloring, sharing professional techniques and product recommendations that can help you achieve stunning results. From choosing the right shade to mastering application techniques, we’ve got you covered. So, are you ready to transform your look from the comfort of your own bathroom? Let’s dive in!
- Save time and money by coloring your hair at home with expert guidance.
- Choose the right shade by considering your current hair color and desired outcome.
- Master lightening and darkening techniques based on the type of hair dye you use.
- Prepare and apply the dye correctly to ensure even coverage and avoid staining your skin or clothes.
- Use the right tools and recommended at-home hair dye products for salon-worthy results.
Choose the Right Shade
When it comes to at-home hair coloring, one of the most important steps is choosing the right shade. Finding the perfect hair color to complement your skin tone, features, and personal style can make all the difference in achieving the desired look.
While it can be tempting to rely solely on the model shown on the box, it’s important to remember that the color may appear different on your hair due to various factors, such as your current hair color and the developer used in permanent dyes. To get a more accurate representation of the final result, it’s best to look at the color swatch on the box.
The color swatch provides a closer approximation of how the dye will appear on your hair. It showcases the shade without the influence of lighting or other external factors, giving you a better idea of what to expect.
When comparing the swatch to your current hair color, consider both the level of darkness or lightness and the undertones. Matching your current hair color to the swatch can help you select a shade that will blend well and give you the desired outcome.
“Choosing the right shade is crucial for a successful at-home hair dyeing experience. By relying on the color swatch instead of the model on the box, you can make a more informed decision and achieve the look you desire.” – Expert Stylist, Jane Miller
Matching Undertones
Understanding the undertones in your current hair color is essential for selecting the right shade. Hair can have warm, cool, or neutral undertones, which can affect how the dye interacts with your hair.
If your hair has warm undertones, such as red or golden hues, opting for shades with warm undertones can create a harmonious blend. On the other hand, if your hair has cool undertones, such as ash or cool blonde, choosing shades with cool undertones can help maintain a cohesive look. For those with neutral undertones, a wide range of shades can work well.
Keep in mind that the level of darkness or lightness of the color, along with the undertones, can create different effects. If you’re unsure about your undertones or need further guidance, consulting with a professional stylist can be beneficial.
“Matching the undertones of your current hair color to the shade you choose is crucial for a seamless transition. It ensures that the dye interacts harmoniously with your hair, creating a natural and flattering look.” – Expert Colorist, Sarah Thompson
Lightening and Darkening Techniques
When it comes to lightening or darkening your hair at home, the approach you take depends on the type of hair dye you’re using. Understanding the differences and following the right techniques can help you achieve your desired shade with confidence.
Going Lighter with Hair Dye
If you’re aiming to lighten your hair, it’s important to choose the right products and approach. When using permanent hair dye, opt for a color that is slightly darker than your desired shade. Permanent dyes contain a strong developer that lightens the natural color of your hair, so choosing a shade slightly darker will result in the desired lightened outcome.

On the other hand, if you prefer a more temporary option, consider using a semi-permanent dye. With semi-permanent dyes, choose a color that is slightly lighter than your desired shade. These dyes do not contain a strong developer and will darken over time. By selecting a lighter shade, you can achieve your desired color as the dye progresses.
Pro Tip: Always conduct a strand test before applying any hair dye to ensure the color outcome is as desired.
Going Darker with Hair Dye
If your goal is to darken your hair, the process may vary slightly. When using permanent hair dye, select a color that is slightly lighter than your target shade. Permanent dyes have a strong developer that will darken the color of your hair. By choosing a shade lighter than your goal, you can achieve the desired darker outcome.
When opting for a semi-permanent dye to darken your hair, choose a color that closely matches your target shade. Semi-permanent dyes do not contain a strong developer, so their darkening effect is limited. The color you choose at the beginning will remain relatively consistent as the dye fades gradually.
Developer and Hair Color Timing
Understanding the role of the developer and following the recommended hair color timing is essential for achieving the desired shade. Developers come in different strengths, such as 10 volume, 20 volume, or 30 volume. The higher the volume, the stronger the developer, resulting in more noticeable lightening or darkening effects. Be sure to follow the instructions on the dye box to determine the appropriate developer volume and timing for your chosen shade.
Comparison of Lightening and Darkening Techniques
| Type of Hair Dye | Going Lighter | Going Darker |
|---|---|---|
| Permanent Dye | Choose a color slightly darker than your desired shade. | Select a color slightly lighter than your target shade. |
| Semi-Permanent Dye | Opt for a color slightly lighter as it will darken over time. | Choose a color that closely matches your target shade. |
Preparation and Application Tips
Before you dive into coloring your hair, take some time to prepare and gather everything you need for a successful at-home dye job. Follow these tips to ensure a smooth and mess-free hair coloring experience.
Perform a Hair Dye Strand Test
Before you apply the hair dye all over your head, it’s important to perform a strand test. This test will give you an idea of how the color will turn out and whether it matches your expectations. Simply select a small section of hair, apply the dye, and follow the instructions on the package. This will allow you to assess the color, quality, and timing before committing to the full application.
Tip: Use a section of hair that is not easily visible so that any potential discrepancies won’t be noticeable.
Protect Your Skin from Dye Stains
Avoid staining your skin with hair dye by applying a clear lip balm along your hairline. The lip balm acts as a barrier, preventing the dye from seeping onto your skin. Be sure to apply it carefully, focusing on areas where the dye is most likely to touch your skin.
Apply Hair Dye on Dry Hair
To achieve optimal color absorption, it’s recommended to apply hair dye to dry hair. Wet or damp hair can dilute the dye and result in a less intense color payoff. Ensure your hair is clean and completely dry before starting the application process.
Don’t Forget to Wear Gloves
Protect your hands from staining and potential irritation by wearing gloves. Most hair dye kits come with disposable gloves for easy use. Put them on before mixing and applying the dye to keep your hands clean and free from any unwanted color transfer.
Note: If you have sensitive skin or are prone to allergies, consider using latex-free gloves to minimize any potential reactions.
Avoid Staining Your Clothes
Hair dye can be messy, so it’s essential to wear old clothes or a robe that you don’t mind getting stained. This way, you can relax and focus on achieving your desired hair color without worrying about ruining your favorite outfit.
Tools and Products for Perfect Results
Using the right tools can make a world of difference when it comes to achieving salon-quality results from your at-home hair dyeing session. Here are a few essential tools and recommended products that can help you achieve the perfect color:
Hair Dye Brush
When it comes to precise application, a hair dye brush is a game-changer. It allows you to apply the dye more evenly, ensuring that every strand is covered. This brush gives you more control, especially when working on small sections or roots. It’s a must-have tool for achieving salon-like results at home.
Coloring Bowl
In addition to a hair dye brush, a coloring bowl is another handy tool to have. It allows you to mix the hair dye and developer thoroughly, ensuring a consistent and smooth application. With a coloring bowl, you can easily customize your color by mixing different shades or toners to achieve your desired look.

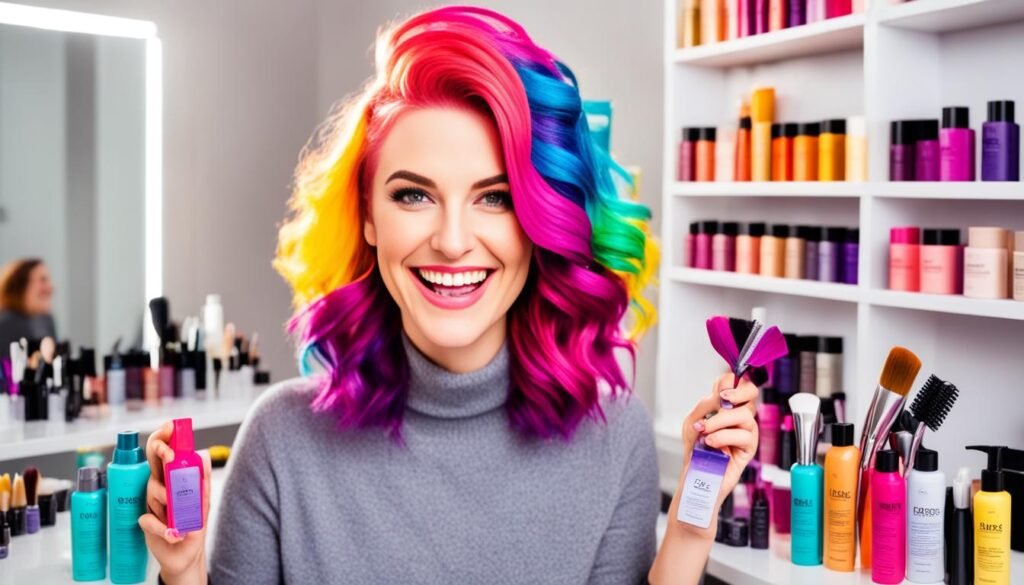
Recommended At-Home Hair Dye Products
| Product | Description | Price | Rating |
|---|---|---|---|
| Manic Panic | A wide range of vibrant and long-lasting colors | $13.99 | 4.5/5 |
| L’Oréal Paris Feria | Multi-faceted shimmering colors with 3X highlights | $9.99 | 4/5 |
| Clairol Natural Instincts | Ammonia-free formula with a blend of antioxidants | $5.99 | 4/5 |
| Garnier Nutrisse | Enriched with fruit oils for nourishing and vibrant color | $6.99 | 4.5/5 |
All of these products have been highly recommended by experts and provide excellent results when used correctly. Choose a product that suits your hair type, desired shade, and level of experience.
Remember, investing in high-quality products and using the right tools can greatly enhance your at-home hair dyeing experience, ensuring flawless results that rival those achieved in a salon.
Tips for Even Coverage
One of the keys to achieving a professional-looking hair color at home is ensuring even coverage. Follow these expert tips to make sure every strand is evenly dyed:
- Dye the Roots First: Start by applying the hair dye at the roots. This is important because the roots require more processing time to achieve the desired color. By dyeing the roots first, you can ensure that they match the rest of your hair.
- Avoid Over-Processing: When applying the dye, be careful not to overlap onto previously dyed ends. Over-processing can lead to damage and an uneven color result. Focus on the roots and only comb the dye through the ends during the last few minutes of the processing time.
- Section the Hair: To ensure every section of your hair is covered, divide it into manageable sections. Use hair clips or rubber bands to create distinct sections. This technique not only helps with even application but also prevents missed spots or uneven color distribution.
- Comb the Dye Through: After applying the dye to each section, use a wide-toothed comb to comb the dye through your hair. This helps distribute the color evenly and ensures that every strand is coated with dye. Comb gently to avoid causing any breakage or damage to your hair.
By following these tips, you can achieve a beautiful, even color result that looks like it was done by a professional. Take your time and be thorough during the application process to ensure the best outcome.
Post-Dye Care and Maintenance
So, you’ve successfully colored your hair. Now, it’s time to take care of your gorgeous new hue to ensure it lasts. Here are some essential post-dye care tips to keep your color vibrant and beautiful:
Wait Before Washing Your Hair
After coloring your hair, it’s important to be patient and wait at least 24 hours before washing it. This waiting period allows the color to fully set and adhere to your hair strands for longer-lasting results. So resist the temptation to wash it immediately and let the color do its magic.
Protect Your Hair from Fading
To maintain the vibrancy of your color, it’s crucial to protect your hair from fading. One way to do this is by using color-safe shampoo and conditioner specifically designed for color-treated hair. These products are formulated to be gentle and will help preserve your color for a longer period, preventing it from washing out prematurely.
Avoid Sun Exposure
The sun’s harmful UV rays can fade your hair color over time. To shield your newly colored locks from sun damage, consider wearing a hat or scarf when spending extended periods outdoors, especially during peak sun hours. By protecting your hair from the sun, you can help extend the life and vibrancy of your color.
Troubleshooting and Common Mistakes
In case of any hair dye mishaps or undesirable color outcomes, it’s crucial not to panic. There are ways to fix and correct color mistakes, ensuring that you can still achieve the desired results. Here are some solutions to common hair dye problems:
Fixing Hair Dye Mishaps
If you’re not happy with how your hair color turned out, don’t worry. There are options to fix the problem:
- Color Removers: You can use color removers specifically designed to remove unwanted hair dye. These products work by breaking down the dye molecules and allowing them to be rinsed out of your hair. Follow the instructions carefully and perform a strand test before applying it to your entire head.
- Toners: If your hair has turned brassy or yellow, a toner can help neutralize the unwanted tones. Choose a toner that is specifically formulated to correct the undertones in your hair color.
Seeking Professional Help
If you’ve tried various methods to fix your hair dye mishap and the issue persists, it’s time to seek professional help. A hairstylist or colorist has the expertise to assess the situation and provide personalized advice and solutions. They can recommend the best course of action to correct the color and ensure that your hair remains healthy and beautiful.
If you’re unsure about how to fix a color mistake or if the problem seems too difficult to correct on your own, it’s always better to seek professional help. A professional will have experience in fixing color mishaps and can save you time, money, and further damage to your hair.
Remember, fixing hair dye mishaps can take time and patience. It’s important to approach the process with a calm mindset and follow professional guidance. With the right solutions and expert assistance, you can achieve the hair color you desire.
Next, we’ll explore helpful tips on how to extend the life of your hair color and maintain vibrant and beautiful locks.
Extending the Life of Your Hair Color
To maintain your vibrant hair color for longer periods, it’s crucial to implement a few care strategies. Here are some tips to help prevent color fading and keep your hair looking fresh:
To minimize color fade, try to limit the frequency of hair washing. Washing hair less often can help preserve the color intensity. Consider using a gentle, color-safe shampoo specifically formulated for colored hair. Additionally, incorporate dry shampoo into your routine to refresh your hair between washes while minimizing color depletion.
Protecting your hair from harmful UV rays is another essential step in preserving your hair color. UV rays can cause color fading, leading to dull-looking hair. Wear a stylish hat or use UV-blocking hair products, such as leave-in sprays or serums, to shield your hair from the sun’s damaging effects.
Another effective way to maintain your hair color is by using color-depositing products. These products, such as color-refreshing gloss or shampoos designed for colored hair, help revive and enhance the vibrancy of your color. Look for products that match your hair shade and follow the instructions for optimal results.