
Are you tired of sparse and unruly eyebrows? Have you ever wondered how to achieve bold and defined brows without breaking the bank? Look no further – DIY eyebrow tinting at home is the answer you’ve been searching for! Forget expensive salon appointments and lengthy waiting times. With the right tools, products, and techniques, you can easily achieve professional-looking results in the comfort of your own home.
In this comprehensive guide, we will walk you through the step-by-step process of eyebrow tinting at home. From choosing the best products to prepping your brows and applying the tint with precision, we’ve got all the tips and tricks you need to know. Get ready to transform your brows and enhance your natural beauty with DIY eyebrow tinting!
Key Takeaways:
- DIY eyebrow tinting is a cost-effective and convenient alternative to salon appointments.
- By tinting your eyebrows at home, you have control over the color and intensity of the tint.
- Choosing the right products is crucial for achieving the best results.
- Properly preparing your brows before tinting ensures a flawless application.
- Follow our step-by-step instructions for mixing and applying the eyebrow tint.
The Benefits of Eyebrow Tinting at Home
Tinting your eyebrows at home offers several benefits. First and foremost, it is a cost-effective option compared to salon appointments, saving you money in the long run. Rather than spending a significant amount of money on professional services, DIY eyebrow tinting allows you to achieve beautiful results without breaking the bank.
One of the key advantages of tinting your eyebrows at home is the control you have over the color and intensity of the tint. When using a home eyebrow tinting kit, you can customize the shade to match your preference and achieve the desired look. Whether you prefer a subtle enhancement or a bold statement, the choice is in your hands.
Another significant advantage is the time-saving aspect of home eyebrow tinting. By choosing to tint your eyebrows at home, you eliminate the need to travel to a salon and wait for an appointment. With a little practice, you can master the technique and achieve salon-quality results in the comfort of your own home.
Additionally, home eyebrow tinting kits often come with multiple applications, allowing you to maintain your tinted brows for an extended period. This saves you from having to repeat the process frequently, providing a convenient and hassle-free experience.
Choosing the Right Products for Home Eyebrow Tinting
When it comes to DIY eyebrow tinting, choosing the right products is crucial for achieving the best results. With the plethora of options available in the market, it’s important to select products that are specifically designed for home eyebrow tinting. Here are some top recommendations:
1. Just for Men Brush-In Color Gel for Mustache & Beard
One of the highly recommended products for home eyebrow tinting is the Just for Men Brush-In Color Gel for Mustache & Beard. While primarily intended for men’s facial hair, many eyebrow tinting enthusiasts have found success with this product due to its long-lasting and natural-looking results. The gel formula is easy to use, and the brush applicator allows for precise application, making it ideal for achieving the perfect brow color.
2. L’Oréal Paris Root Rescue
Another excellent choice for DIY eyebrow tinting is the L’Oréal Paris Root Rescue kit. Although this product is marketed for root touch-ups, it also works effectively on brows. The kit includes targeted color applications, making it convenient for brow tinting. L’Oréal Paris is a well-known and trusted brand, ensuring the quality and reliability of the product.
No matter which product you choose, it’s essential to follow the manufacturer’s instructions for mixing and application. This will ensure that you achieve the desired results and minimize the risk of any adverse reactions.
Brief for Section 4
Preparing Your Brows for Tinting
Before you embark on your DIY eyebrow tinting journey, it’s important to properly prepare your brows. Following these simple steps will help ensure optimal results.
- Cleanse your brows: Start by washing your eyebrows to remove any dirt, oil, or makeup residues. This will create a clean canvas for the tinting process.
- Brush and shape: Using a spoolie brush, gently comb through your brows to remove any tangles or stray hairs. This will help create a uniform and defined shape for your tinted eyebrows.
- Protect the surrounding skin: Apply a thin layer of petroleum jelly or Vaseline around your eyebrows. This barrier will prevent the tint from staining the skin, making cleanup much easier.
- Perform a patch test: To avoid any adverse reactions, it’s crucial to perform a patch test before applying the tint to your entire eyebrows. Apply a small amount on a small area of skin and wait for 24 hours to check for any allergies or sensitivities.
By taking these steps to prepare your brows, you’ll create the perfect foundation for a successful DIY eyebrow tinting experience.

Mixing and Applying the Eyebrow Tint
Now that you have prepped your brows, it’s time to mix and apply the eyebrow tint. Follow this step-by-step process to achieve stunning results at home.
- Choose the right shade: Select a shade that is two to three shades lighter than your hair color. This will create a natural-looking result and prevent your brows from appearing too dark.
- Mix the tint: Refer to the instructions provided with your chosen tinting product. In most cases, you will need to mix the dye and developer together. Ensure that you follow the recommended proportions to achieve the desired color.
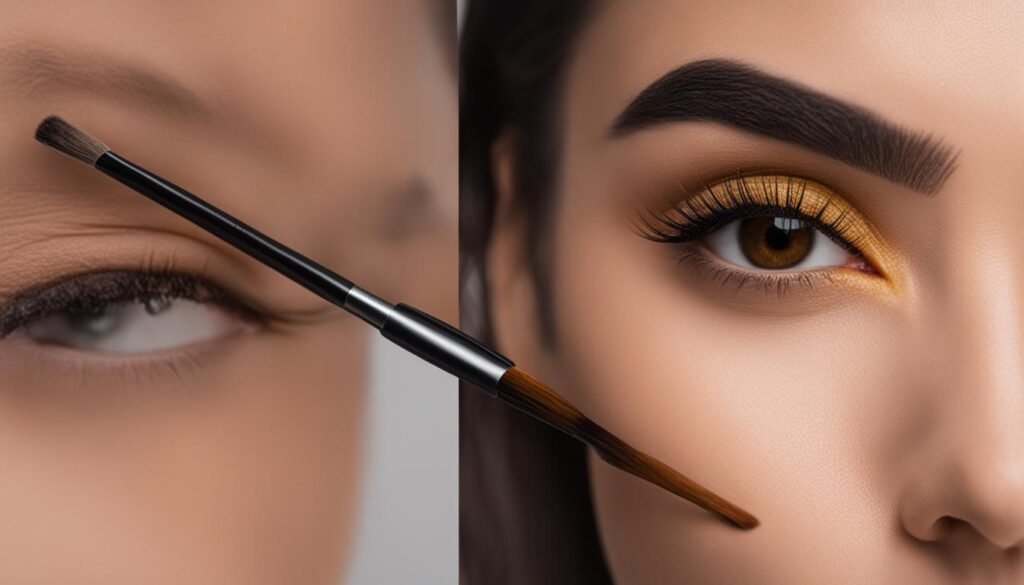
- Apply the tint: Using a small brush or spoolie, start applying the tint to your brows from the front and work your way towards the tail. Focus on the hair itself and avoid getting the tint on the surrounding skin.
- Remove any excess: If any tint accidentally gets on the skin, use a damp cotton swab to clean it up immediately. This will prevent any unwanted staining.
- Let it sit: Allow the tint to sit on your brows for the recommended amount of time. This will vary depending on the product you are using, so be sure to check the instructions.
- Remove the tint: Once the processing time is up, gently remove the tint by wiping it off with a wet cotton pad or paper towel. Start from the front and carefully wipe towards the tail to avoid smudging the color.
Remember, it’s essential to follow the instructions provided with your specific tinting product for the best results. Take your time, be precise, and avoid rushing through the process.
Tips for a flawless application:
Always start with a lighter shade and gradually build up the color if needed. This will prevent your brows from looking too dark or unnatural.
Create a barrier around your brows: Before applying the tint, use petroleum jelly or Vaseline to create a protective barrier around your eyebrows. This will help prevent the tint from staining the surrounding skin.
Concentrate on the hair: When applying the tint, focus on the brows’ hair itself rather than the skin underneath. This will ensure a more natural and blended result.
Perform a patch test: Before using any tinting product for the first time, it’s crucial to perform a patch test to check for any allergic reactions. Apply a small amount of the tint to a small area on your arm and wait for 24 hours. If any irritation or redness occurs, avoid using the product.
By following these steps and considering these tips, you can confidently mix and apply eyebrow tint at home, achieving salon-quality results. Experiment with different shades and techniques to discover your perfect brow look. Now that your brows are beautifully tinted, it’s time to move on to the next section: post-tinting care for your tinted brows.
Post-Tinting Care for Your Tinted Brows
After you have tinted your eyebrows, it is essential to provide proper care for them to maintain the desired results. Following a few simple aftercare steps will help extend the longevity of your tinted brows and keep them looking their best.
To maintain your tinted brows:
- Avoid using skincare products that contain ingredients known to lighten the brows, such as vitamin C serums or alpha-hydroxy acids. These can cause the color to fade faster.
- Minimize sun exposure as much as possible. Direct sunlight can fade the tinted color, so wearing a hat or using sunscreen on your brows when spending time outdoors is recommended.
- To nourish your brows and promote healthy growth, apply a small amount of castor oil or vitamin E oil using a spoolie brush a few times a week. Massage the oil gently into the brows for added benefits.
- Be cautious when cleansing your face, particularly around the brow area. Avoid rubbing or scrubbing the tinted brows to prevent premature fading or color loss. Instead, use a gentle touch and pat the area dry.
By following these post-tinting care tips, you can enjoy beautifully tinted brows for an extended period, enhancing your overall look and saving time on daily makeup routines.
Alternative Options for At-Home Brow Tinting
While traditional eyebrow tinting involves using hair dye or specialized tinting kits, there are alternative options available for those who prefer a different approach. Explore these alternative methods to achieve beautifully tinted brows at home:
Henna Brow Tint
One option is to try henna brow tint, a natural and chemical-free solution that provides temporary color and helps strengthen the brow hairs. Henna is derived from a plant and has been used for centuries to dye hair and skin. When applied to the eyebrows, henna creates a rich and long-lasting color that enhances the shape and definition of your brows.

Peel-off Eyebrow Gel Tint or Waterproof Eyebrow Gel
Another alternative is using peel-off eyebrow gel tint or waterproof eyebrow gel. These products offer temporary color that lasts for several days, making them a convenient choice for those who want a quick and hassle-free brow tinting option. Simply apply the gel tint or gel onto the brows, let it dry, and peel it off to reveal beautifully tinted brows.
Both henna brow tint and peel-off/waterproof eyebrow gel tint can be found in various brands and shades, allowing you to choose the option that best suits your preferences and desired look.
By exploring these alternative options, you can achieve the desired brow tinting results in the comfort of your own home. Whether you prefer natural and chemical-free henna or the convenience of peel-off/waterproof gel tints, these alternatives provide you with more flexibility and choices for your at-home brow tinting routine.
Tips for Successful DIY Brow Tinting
To ensure successful DIY eyebrow tinting, here are some expert tips and best practices to keep in mind:
- Start with a lighter shade of tint and gradually build up the color if needed.
- Always perform a patch test to check for any allergic reactions.
- Take your time and be precise when applying the tint to avoid getting it on the skin.
- Use petroleum jelly or Vaseline to create a barrier around the brows.
- Follow the recommended processing time and monitor the tint to achieve the desired darkness.
- Finally, remove the tint carefully and assess the results before making any adjustments.
Remember, practice makes perfect, so don’t be discouraged if it takes a few tries to get the hang of it.
Final Thoughts on DIY Eyebrow Tinting at Home
DIY eyebrow tinting at home can be a game-changer for achieving fuller and more defined brows. By following the right techniques and using high-quality products, you can save time and money while enjoying the benefits of tinted eyebrows.
Experimenting with different shades and application techniques is key to finding what works best for you. Whether you prefer a natural-looking tint or a bolder, more dramatic result, there are options available to suit your preferences.
However, if you’re unsure about the shape or color of your brows, it’s always a good idea to consult a professional. They can provide personalized advice and ensure you achieve the desired outcome without any mishaps.
Once you’ve successfully tinted your eyebrows at home, it’s important to take good care of them. Avoid using skincare products that may cause lightening or fading, and protect your tinted brows from excessive sun exposure. Regularly nourish your brows with oils like castor oil or vitamin E oil to keep them healthy and promote growth.
In conclusion, DIY eyebrow tinting offers a convenient and cost-effective way to enhance your brows. With the right tools, techniques, and a little practice, you can achieve beautifully tinted eyebrows that will elevate your overall look. Embrace the confidence that comes with perfectly defined brows and enjoy the results of your DIY brow tinting journey. Happy tinting!